


High Hydration Sourdough
(By Hannah Dela Cruz, blogger and cookbook author)
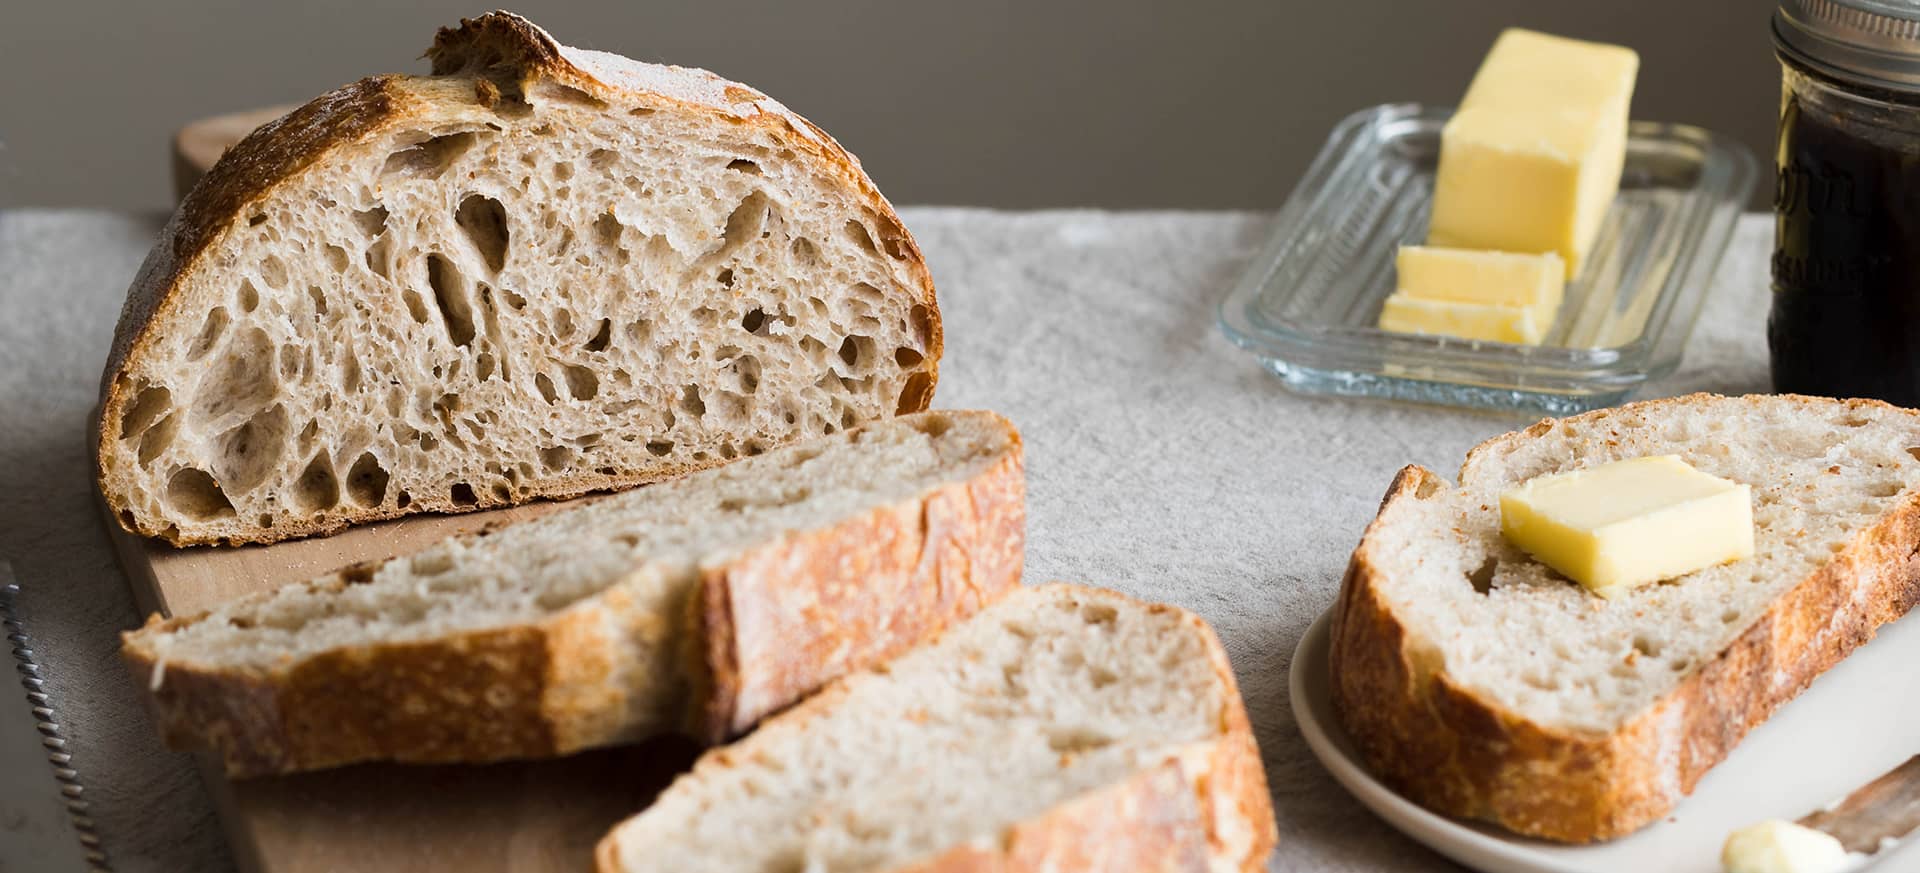
High hydration dough results in bread with a thin and crackly crust and a tender, evenly open crumb. When done right, the baked result is sublime: bread that’s light and airy with a creamy texture and an impeccable mouthfeel. As a bonus the loaf stays moist and tastes fresh for days after it's baked!
It’s easy to see why baking with high hydration is a goal for a lot of home bakers. Due mostly to the allure of countless photos of “perfect loaves” on social media, a lot of people jump on the high hydration train a little too early without having the foundation they need to truly make great bread. The result? Loaves that are flat as a saucer and a deflated self esteem.
Although bread is still edible (and delicious) when it’s flat, it’s always so much more gratifying to be greeted by a loaf of bread with a great rise when you open your oven door. Baking a high hydration loaf successfully is a testament to your skill and expertise as a baker. It’s really tempting to try a high hydration loaf in the beginning of your journey, but not having the foundations of bread making can result in failure and have you feeling lost.
In this blog we will be covering some tips for success and our go-to formula to guide you on your way to getting high hydration sourdough bread right.
What is hydration level?
Hydration level is simply the total amount of water relative to the amount of flour in your dough. To calculate this, simply divide the total amount of water in the recipe by the total amount of flour. In sourdough recipes, you’ll have to account for the amount of water and flour in your starter. This recipe uses a 100% hydration starter, which means it has been fed with an equal amount of flour and water. Taking into account the water and flour in the starter, this loaf consists of 760 grams of water and 920 grams of flour. In total, the hydration level of this bread is 82.6%.
High Hydration Sourdough Recipe
Scroll to Printable Recipe
Yield: Two loaves.
Timing: Mixing and Folding --
Active: 2 hours; Inactive: 13 to 14 hours; Total: 15 to 16 hours

Ingredients
| Ingredient | Grams | Ounces | Baker’s % |
|---|---|---|---|
| Active Starter | 240 | 8.5 | 30 |
| Bread Flour | 800 | 28.2 | 100 |
| Water | 640 | 22.6 | 80 |
| Salt | 16 | 0.56 | 2 |
Total Hydration: 82.6%
Equipment
- Folding Proofer
- Baking Scale
- Dough Whisk
- Large Mixing Bowl
- Bench Knife
- Two Bannetons
- Lame or sharp knife
- Bread Steel
- Baking Shell
- Cooling Rack
Autolyse: Add warm water (85-95°F / 30-35 °C) to a mixing bowl, and then slowly add in flour. Using a dough whisk or your hand, mix the flour and water until all the flour is incorporated. Cover your dough and allow it to rest for 45 to 60 minutes in the Folding Proofer.
Mix your dough: Fold the starter and salt into the autolysed dough. We find using our hands works best for this step so you can feel if the salt has fully incorporated into your dough. Place the bowl back into the Folding Proofer for 45 minutes.
Bulk Fermentation: Fermentation begins the minute you mix sourdough starter into your dough. Set a timer for 4 hours, this will act as a guide to help you determine when your bread is ready to be shaped. Remember to always look for signs of fermentation, and adjust the timing if your dough does not look properly proofed.
Slap and fold: After the 45 minute rest period, take your dough out of the Brod and Taylor Folding Proofer and turn it out onto a clean, lightly floured surface. Using your fingertips, pick up the edge of the dough closest to you, lift the dough and slap it on to your work surface. Repeat this process until your dough appears smoother and feels less sticky to the touch. Place your dough in a clean, lightly oiled bowl, return it to the Folding Proofer and allow it to rest for 30 minutes. Using the slap and fold method is a great way to build strength into your dough during the early stage of breadmaking when your dough can be quite sticky and difficult to work with.
Coil fold: Once your dough has rested, perform a coil fold by lifting the center of the dough until it completely releases from your bowl. Fold both ends under, turn the bowl 90 degrees and repeat. Perform 3 to 5 sets of coil folds in 30 minute intervals until the dough feels strong. Return it to the Folding Proofer. Throughout the folding process, the dough should get progressively less sticky. Once you have completed your last fold, the dough should feel only slightly tacky, shouldn’t get stuck to your fingers when you touch it, and eventually pass the windowpane test. Once the dough has built up enough strength allow it to rest undisturbed for the remainder of the bulk fermentation period.
Tip: Passing the windowpane test is a good indication that you have developed enough strength and gluten development in your dough. Working with damp finger tips, pick up a portion of your dough and gently stretch it. Once your dough can stretch out into a thin translucent membrane without breaking, you have passed the windowpane test. (see the picture under "Build strength with gentle handling" below.)
Check your dough: Once the 4-hour timer has elapsed, check your dough for signs of fermentation. At this point, it should have a noticeable increase in volume, the edges of the dough should look rounder, there may be bubbles on the surface, and it should feel like it is full of air. If the dough does not show these signs add a bit more time to the bulk fermentation and keep checking until the dough appears ready to shape.
Preshape: Preshaping is an extremely important part of baking high hydration sourdough, as it gives you another opportunity to build tension and structure in your loaf. Once the dough is done bulk fermentation, , turn it out onto a lightly floured surface (if it is properly proofed, it should easily slide out of the bowl). Working very gently, flip your dough over so that the smooth side is on top. Now, divide the dough into two equal portions using your bench knife. Working with one piece of dough at a time, gently round the dough by tucking the edges underneath itself using your bench knife or your hands. Once your dough has formed a tight ball, cover it with plastic wrap or a damp tea towel. Repeat with the remaining portion of dough. Let the dough rest for 30 minutes.
Shaping: Prepare your proofing vessel, if using a banneton dust it liberally with rice or bread flour. If using a bowl, line it with a tea towel and dust the towel liberally with rice or bread flour. Set aside while you shape your dough.
Batard shaping: Gently flip your dough over and flatten it out into a rectangle, working carefully so that you don’t pop the bubbles in the dough. Stretch the top of the dough as far as it will go and fold it towards the middle, repeat with the side of the dough closest to you. Then, turn the dough 90 degrees, stretch the top of the dough again and fold three quarters of the way towards the center of the dough, pinch the upper right and upper left corner of the dough. Repeat this two more times, during the last fold, you should be able to roll the dough over to form a log. Gently roll the log towards you to create tension on the outer surface of the dough. The dough should feel tight and appear smooth. Place the dough seam side up into your banneton. Pinch the bottom of the dough closed using your finger tips.
Boule shaping: Gently flip your dough over and flatten it out into a rectangle. Working with the side that is closest to you, stretch the dough as far as it will go and then fold it towards the middle. Grab the left and the right side, stretch them as far as they will go and fold one over the other. Stretch the top of the dough and fold it towards the middle. Turn the dough 90 degrees and fold it over on itself to form a log. Carefully round the dough tucking it under itself until you end up with a tight ball. Place the ball of dough seam side up into your proofing vessel. Pinch the seam closed using your finger tips.
Cold proofing: Cover your dough in plastic wrap (a clean grocery bag works great) and place them inside your refrigerator. Let the dough rest overnight, this will slow fermentation while helping your dough develop a deeper flavor.
Turn on your oven: About 20 minutes before you are ready to bake, place the bread steel in the lower ⅓ of your oven and preheat to 475°F (246°C). The steel heats quickly, and when the oven is ready, the bread steel will be too. There is no need to preheat the Bread Shell.

Score the dough: When the oven is ready, remove one loaf from the refrigerator. Turn the loaf out onto a well-floured bread peel or a piece of parchment paper. Using a lame or a very sharp knife cut a ¼-inch deep score on one side of your dough, you will want to cut near the top.
Bake: Slide your loaf onto the hot steel and immediately cover it with the Bread Shell. Bake for 20 minutes with the shell on. Remove the shell, turn the oven down to 450°F (232°C), and continue baking for another 18 to 20 minutes. Remove from the oven and the loaf on a rack to cool. Repeat baking steps with the second loaf.
Allow the loaves to cool for 2 hours before slicing.
Keys to success
Over the last few years of making sourdough bread, I have gained experience and knowledge that has allowed me to bake delicious bread consistently. For me this means, a light loaf, with an even and soft crumb with holes dispersed throughout and absolutely no dense spots.
Regulate dough temperature: Temperature dictates the speed of fermentation. Hot temperatures make yeast overactive, speeding up fermentation times, while cold temperatures make yeast tired and groggy which drastically slows down fermentation. This means that fermentation times could vary wildly depending on the weather or as seasons change and makes temperature the most important variable in bread making. Your dough should be at a temperature of around 75°F to 78°F (23°C to 25°C) to encourage fermentation. The Brod and Taylor Folding Proofer maintains a constant temperature that allows you to create an environment that allows fermentation to occur at an optimal level. We highly recommend storing your starter and keeping your dough in the Proofer during bulk fermentation.
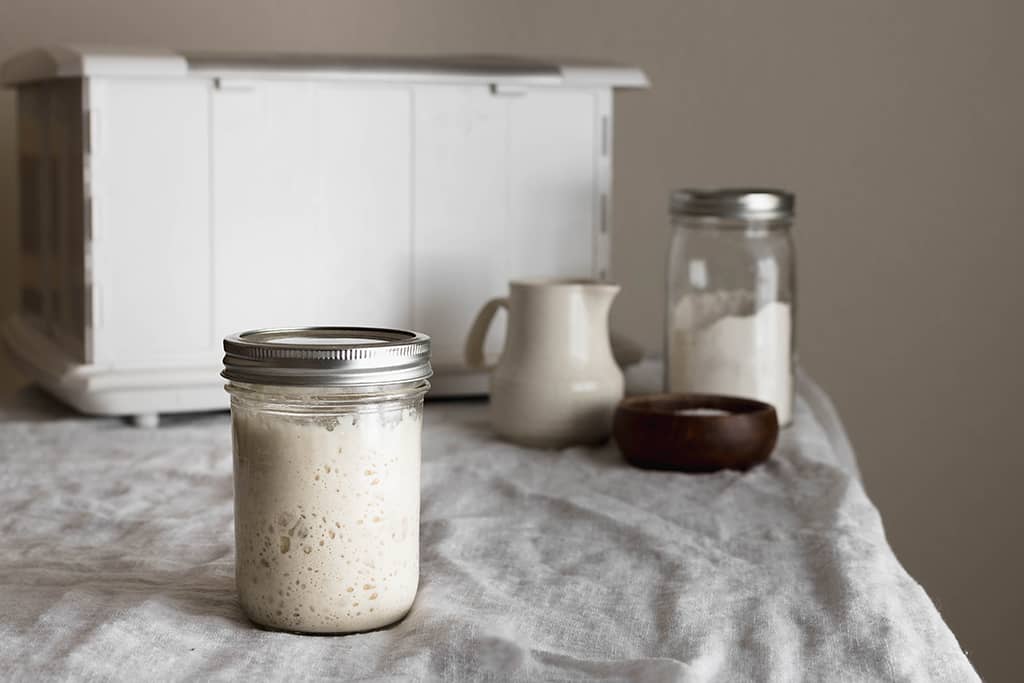
Use an active starter: While it is possible to bake with an inactive starter, using one that is active and vigorous will allow you to gain an idea of the time it takes to create a loaf of bread from start to finish. This recipe calls for a starter that is fed and is at the peak of activity, about 4 to 6 hours after being fed. We find that this encourages a lighter bread with an open and airier crumb.
Autolyse without the starter: Autolyse is the mixing of flour and water in a bread recipe. With higher hydration doughs, we like to let our autolysed dough rest for at least one hour before adding our starter. This allows the flour to properly hydrate and develop extensibility resulting in a dough that is considerably less sticky and much easier to work with.

Build strength with gentle handling: The more water is added to dough, the more strengthening it needs to build a strong gluten network. A strong gluten network is needed to trap gasses resulting in bread with a good structure and great rise. When handling wet sticky doughs, it is important to be very gentle by using your fingertips instead of grabbing the dough with your entire hand. Even when using the slap and fold method, always pick up your dough gently with your fingertips only. A common mistake we see people make is being rough with their dough when it feels wet and difficult to handle, which only makes things worse. If your dough feels too sticky, work with wet hands or allow it to rest for an additional 10 to 15 minutes before working with it again.
Watch the dough not your clock: Mastering your sourdough process comes down to gaining a knowledge of fermentation. We are giving time cues in this recipe, but you need to treat these as guides and adjust when necessary depending on how your dough looks throughout the bread making process. A properly fermented dough should increase in size by 30 to 50% (not doubled), it should look and feel bubbly, be only slightly tacky and feel full of air, and when you turn it out to shape, it should easily slide out of its container.
Stick to one formula: The key to making good bread is predictability. Once you begin baking sourdough bread, no matter the hydration level, it’s important to stick to one formula until you get it right. Your sourdough starter is a symbiotic culture of microorganisms, it is a living thing that responds to its environment. Baking bread is all about responding to the variables that affect your yeast. Simple factors like the temperature in your kitchen or the vigorousness of your sourdough can drastically affect the outcome of your bake. Mastering a single recipe will help you predict how your dough will react to different factors and will give you an understanding of how to respond to any changes in the activity of your yeast. It will also allow you to gain a familiarity with how dough is supposed to look and feel at every step of the process.
Baking bread takes repetition and mastery. Time and patience are the key to developing your skills as a bread maker. If you don’t get it right the first time, keep baking and you’ll gain the experience and expertise you need to consistently produce great bread!


